

By: Cecelia Wilken a recent ASU Nutrition Student
I am a proprietor of making my own things. Maybe it’s because I’m stubborn, but I refuse to buy something that I can make myself. Especially if I can make it better. In today’s fast-paced, technologically forward society, you can buy almost anything with a click of a button. Food is mass-produced to meet the growing demands of our population and ultimately, the gap from farm to table continues to grow. Simple foods like butter are no longer needed to be churned by hand. Instead, you walk to the dairy aisle and pick out your favorite brand. And we are MISSING OUT! Butter is so easy to make yourself and so yummy.
One Thanksgiving we had family and friends over and as always, I went all out, even making my own hand-made butter infused with fresh herbs and garlic from the garden. Everyone raved over it, saying it was the best butter they had ever had. They asked me where I bought it, they simply had to go buy some for themselves. When I told them that I made the butter myself, I was met with confusion. Making the butter myself must have meant I melted down a stick of butter, mixed in some herbs and stuck it back in the fridge. When I explained myself, I couldn’t believe how shocked everyone was. They turned to my husband in disbelief, in which he responded with a “this is normal for her” shrug.
“Wait. You made your own butter? You mean, you churned it yourself?” They simply couldn’t understand how or why I would partake in such a seemingly old-fashioned practice. Then I explained how easy it was, how it was more cost-effective and not to mention how much yummier it was than store-bought. I’m pretty sure I converted half of our guests that day.
Making your own butter doesn’t require any fancy tools or tricks. It simply takes a bit of patience and a few ingredients.
What You’ll Need:
- Heavy cream (at least a pint): The fresher the better! If you have a cow in your backyard (or your neighbors), lucky you! I buy my cream from a modern-day milkman service that supplies my local area with fresh dairy products weekly. But store-bought will also work just fine.
- Stand-Mixer or similar. If you do not have a stand mixer, a hand mixer, food processor, blender or even a water bottle or mason jar will do the trick.
- Spatula
- Cheesecloth (optional, but helpful)
- Optional: Salt, buttermilk & other add-ins**
Instructions:
- Gather all ingredients/supplies. Pour all the heavy cream into your stand mixer, start by turning on slow speed, and gradually speed it up as the cream begins to thicken.
If you are using blender bottle/mason jar/any sealable container, be prepared for an arm workout. Instead of mixing the cream, you just shake the container! Voila, butter.
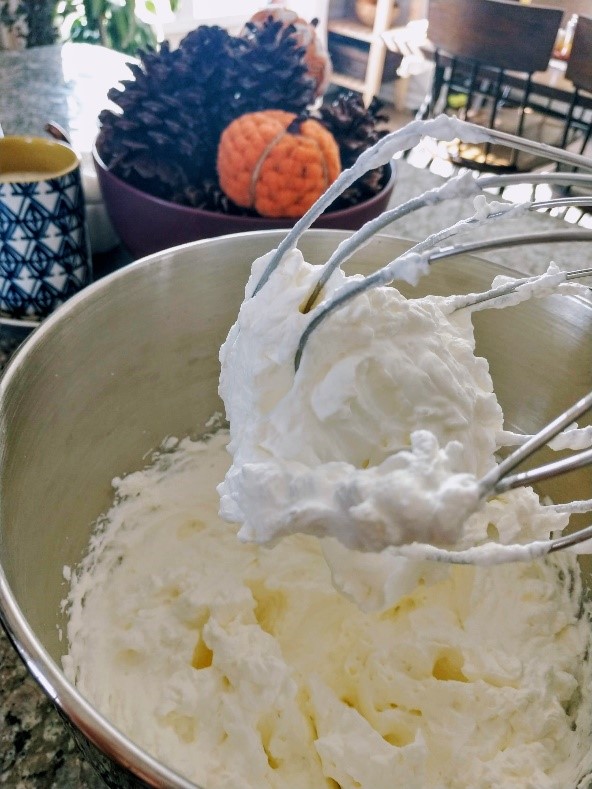
- As the cream whips, occasionally stop to scrape the sides of the bowl. This will ensure even mixing. As some point, it will look a lot like whipped cream. This is what we want to see. Keep going!
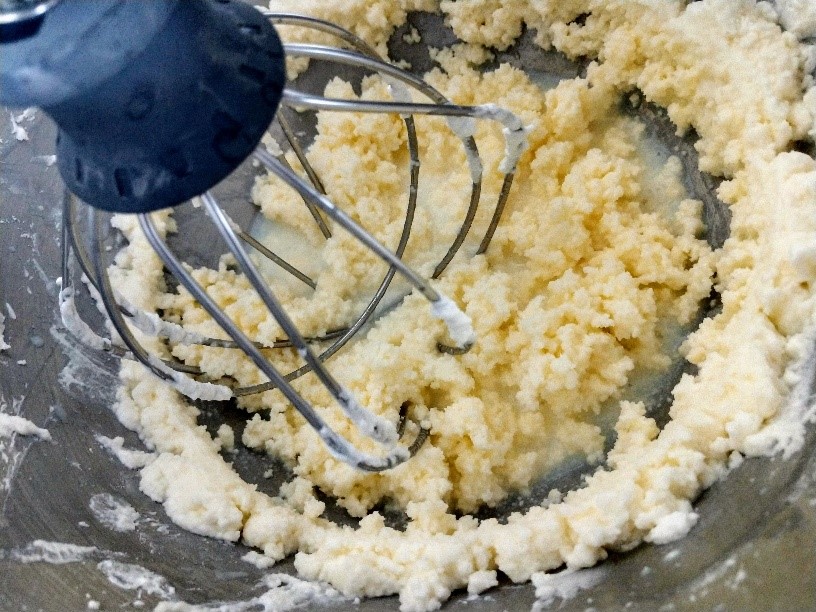
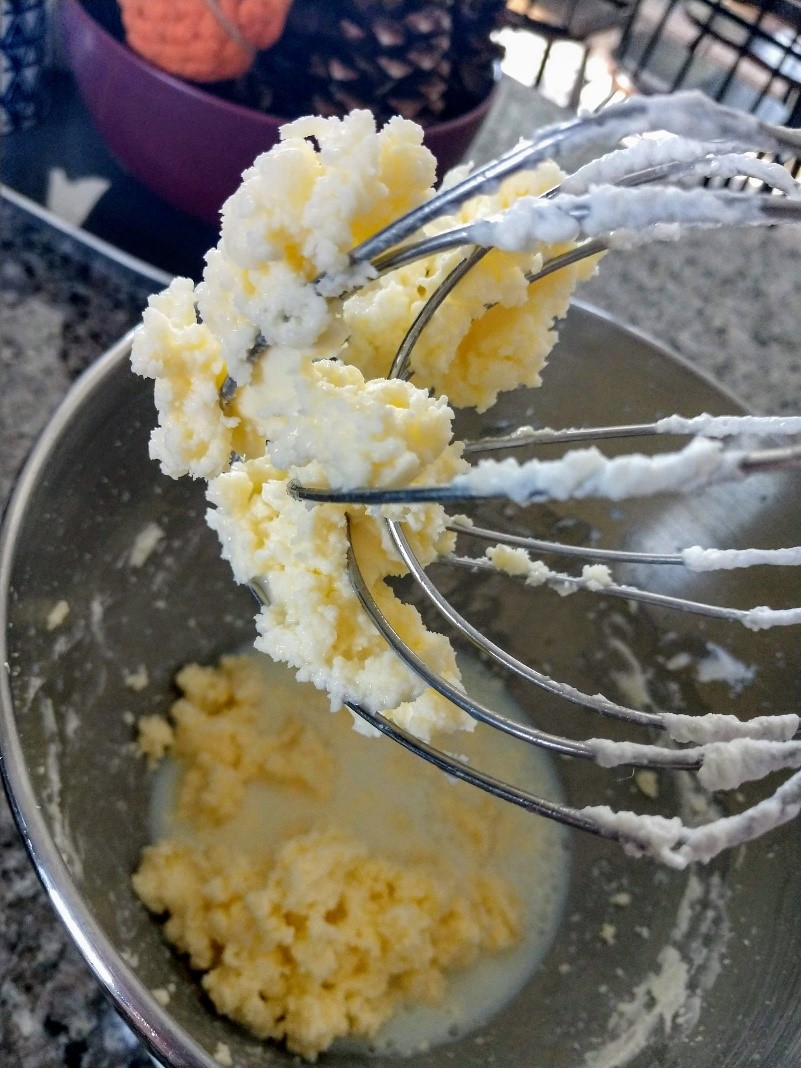
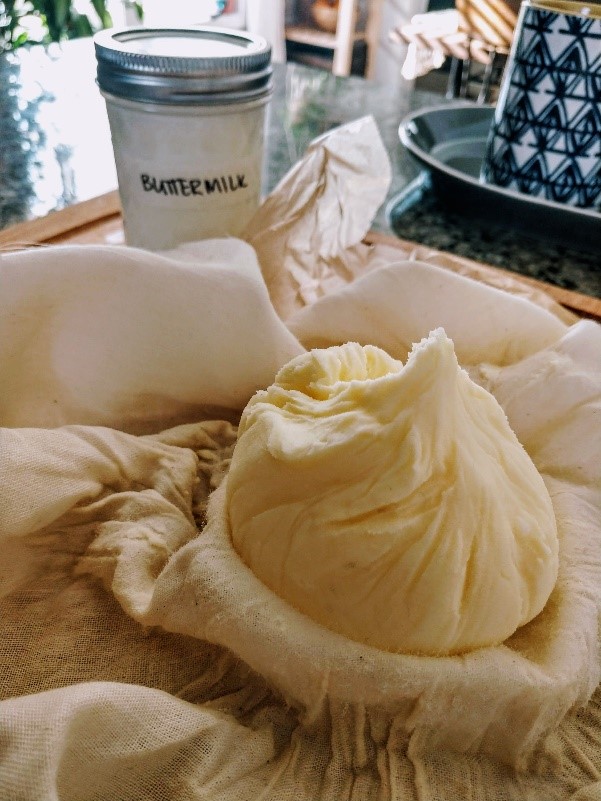
Eventually, you will notice separation. You will begin to see large chunks of butter start floating to the surface of a milky liquid (This is buttermilk! Save this for later!)
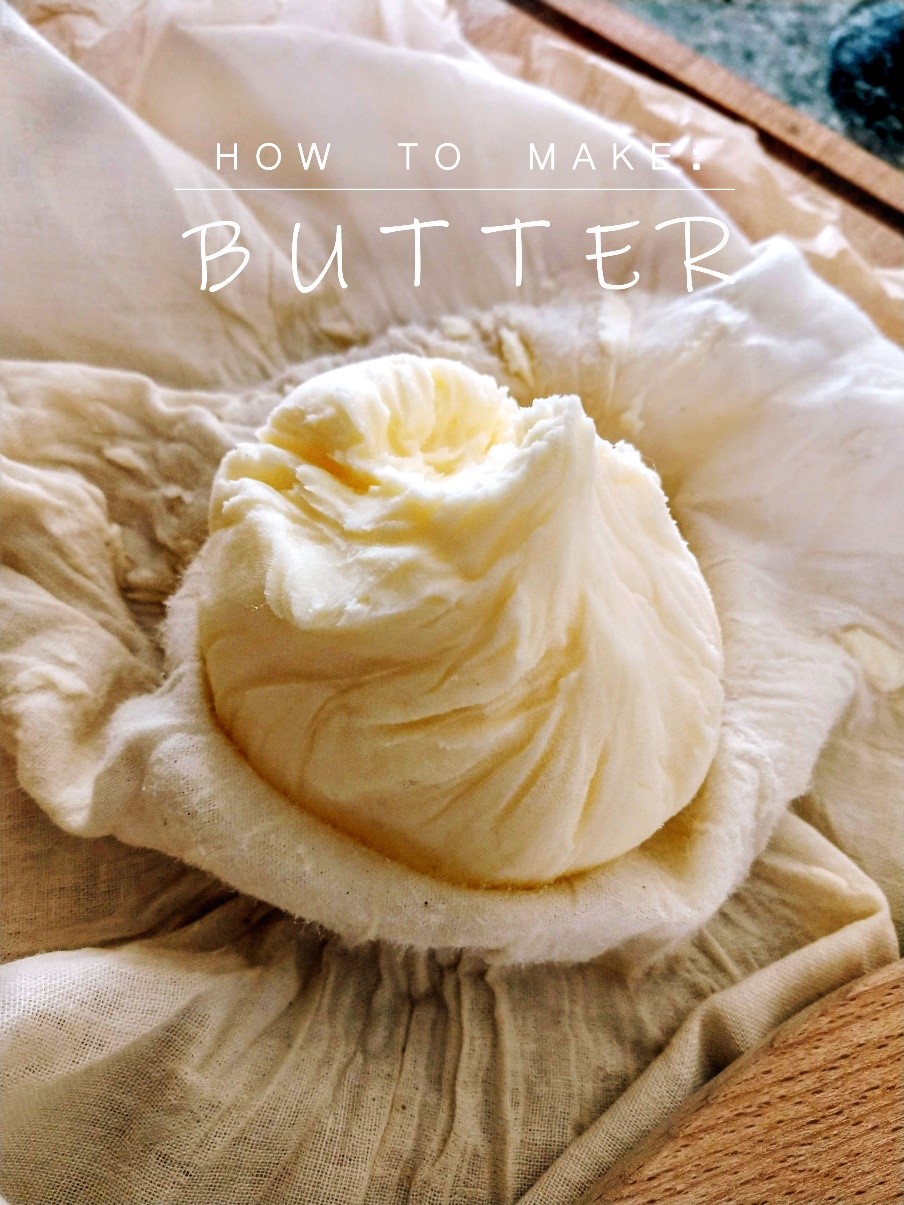
- Place a cheesecloth over a large bowl and pour the butter/buttermilk mixtures into it. Squeeze and knead the butter in the cheesecloth to remove extra buttermilk.

No cheesecloth? No problem! Simple scoop the chunks of butter out with clean hands, and gently massage the liquid out of the butter under some cold water.
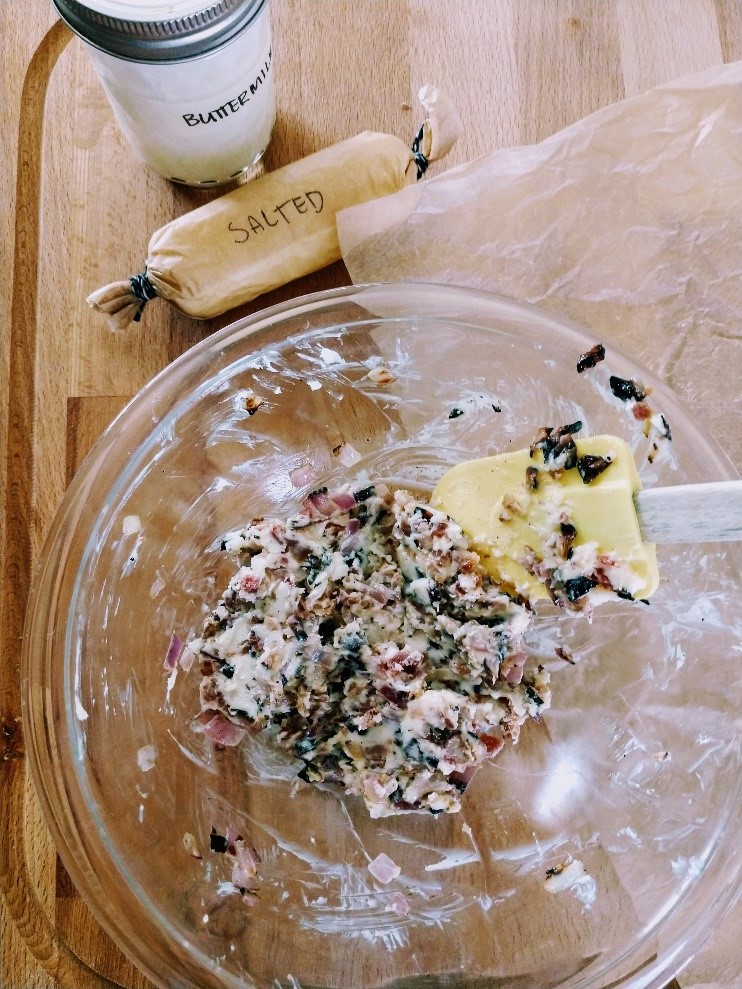
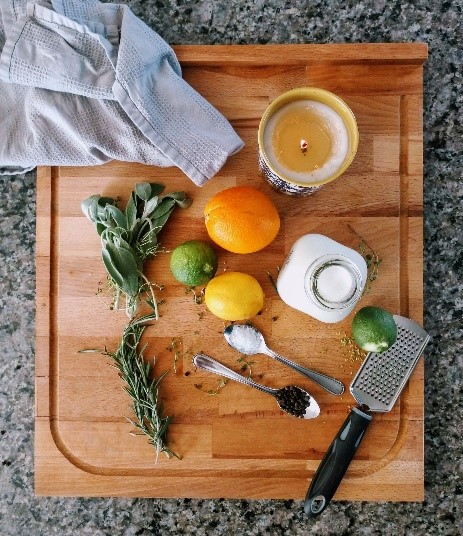
- At this point, your butter can be eaten, salted, flavored, or frozen! Now is the perfect time to add in fresh herbs, spices, citrus zest, salt, and pepper even cinnamon and sugar! I like to make a lot of butter all at once, separate it out and make many different kinds.
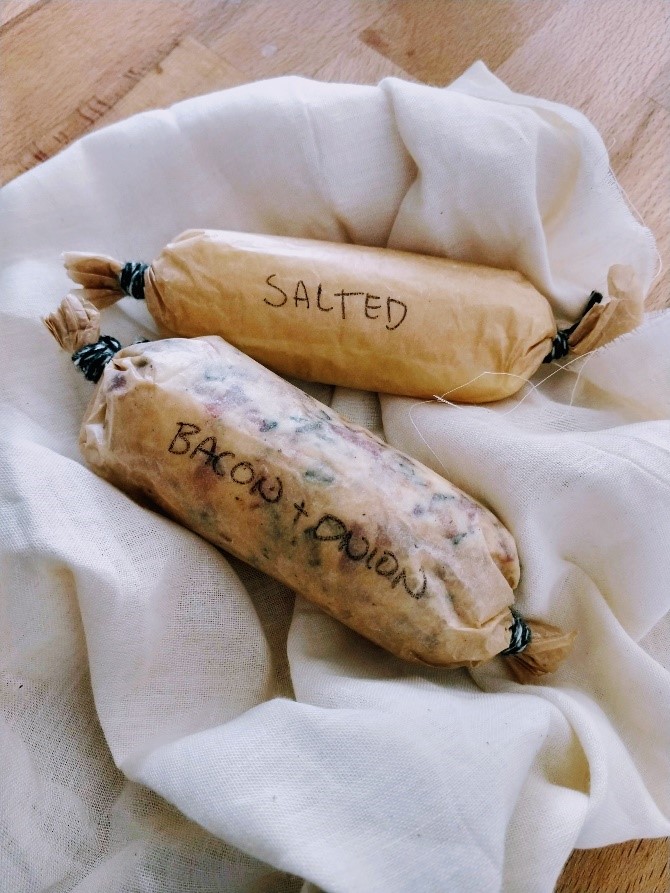
- To store you can either seal it in a mason jar, or Tupperware container. I personally like to wrap extras up in some parchment paper and place it in a freezer-safe bag for preservation.
Extra tips for success:
- To make cultured butter combine 1 tablespoon of buttermilk to every pint of cream. Let it sit, covered for at least 8 hours at room temperature. As the mixture sits, bacteria break milk sugars down resulting in richer tasting butter. This will make your butter taste “butterier”.
- The more liquid you get out of your butter the longer your butter will last. The longer you “knead” the butter, the more buttermilk you can pull from the solid.
- To make “salted” butter simply knead in as much salt as desired. I prefer using flaked sea salt, but any salt will work. Additionally, adding salt will also help draw out more buttermilk out of your butter and acts as a preserver.
- My 3-year-old also loves to help make butter! I’ll simply hand her a well-sealed mason jar filled with cream and let her shake it, roll it, and run around with it until butter forms. It’s a great way for her to feel like she is helping, and to let her expend some energy.
Some of my favorite flavor combinations:
- Cinnamon, Vanilla, Honey (On homemade buttermilk biscuits? Bliss!)
- Bacon & Sautéed Onion (Great on steaks and burgers)
- Sun-Dried Tomato & Basil
- Rosemary, Thyme & Sage
- Roasted Garlic Herb (Wonderful on roasted chicken)
- Orange Zest & Sage
- Chipotle Lime (Amazing on grilled corn)
- Honey Sriracha
- Cognac Cranberry Orange
The possibilities are only limited to your imagination! Roll your flavored butter into logs, wrap in parchment paper, stick it in a bag and freeze it. The next time you need your flavored butter all you have to do is pull it out, cut off a sliver, and place it right onto cooked food or in the pan for easy seasoning.
Looking for more recipes? Check out the Fill Your Plate recipe section. If you liked this article, then you will love the Fill Your Plate blog.